Sweet Taste Test: DIY Box of Gummies

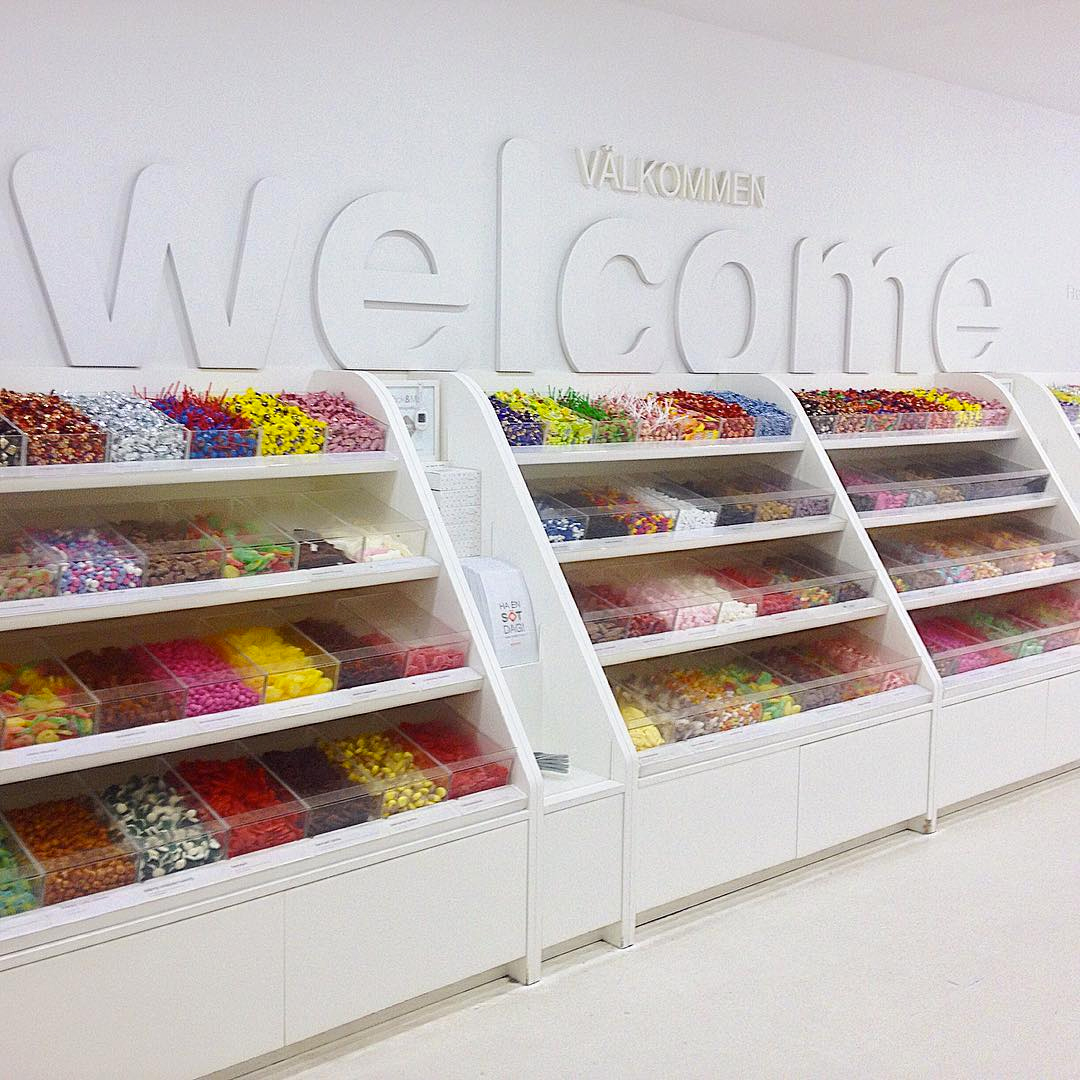
I absolutely love gummy candies. So imagine my excitement when I stumbled upon Sockerbit, a charming Swedish candy shop in New York City's West Village. It is a candy lover's paradise with a plethora of gummy treats to choose from in a minimally-designed space that is undeniably Scandinavian.

After joyfully eating through half of my purchased sweets even before I made it home, I was inspired to send some to my boyfriend back in California. Of course, I would make a DIY project out it, designing a custom candy box filled with treats for him to sample.

ThenComesColor_DIY_SweetTasteTest_Sockerbit2.jpg

I began my project by taking a trip back to Sockerbit and picking out sixteen different gummies. It was really hard to narrow down my selection but I tried to pick a variety of flavors, colors and shapes. I also tried to make sure they would comfortably fit into the candy box. Aren't they all so colorful and pretty!?

ThenComesColor_SweetTasteTest_Gummies.jpg

I would need to design a few printed items to bring this candy box to life. I began by creating a box liner with each gummy's name and assigned number on it.

ThenComesColor_DIY_SweetTasteTest_Lining1.jpg

I inserted the box liner into the base of a plain white box that I got at a craft store. This box measured 4.37"(L) x 5.75"(W) x 1"(H).

ThenComesColor_DIY_SweetTasteTest_Box.jpg
ThenComesColor_DIY_SweetTasteTest_Lining2.jpg

A box label reading "Sweet Taste Test" was adhered to the center of the lid.

ThenComesColor_DIY_SweetTasteTest_Label.jpg
ThenComesColor_DIY_SweetTasteTest_Lining3.jpg

Next onto the box divider. I cut three strips of cardstock to fit the width and height of the box and three strips to fit the length and height. Then I cut three evenly-spaced slits in each strip, making sure not to cut all the way through. I, then, carefully inserted the strips into one another to create a secure interlocking piece, as seen in the below right image.  

ThenComesColor_DIY_SweetTasteTest_Divider1.jpg
ThenComesColor_DIY_SweetTasteTest_Divider2.jpg

The divider fit perfectly into the box. What a relief!

ThenComesColor_DIY_SweetTasteTest_Divider3.jpg
ThenComesColor_DIY_SweetTasteTest_Divider4.jpg

Next, I designed a score card that asked my boyfriend to rate each gummy on a scale of 1 to 10, with 10 being the tastiest. The scorecard also asked if each gummy tasted better than my favorite gummy of all time, Autodrop Cadillacs from Holland. They are the only things that make my tastebuds literally jump when I think about them. I am salivating right now!

ThenComesColor_DIY_SweetTasteTest_ScoreCard.jpg

And finally a note card with a poem. As what candy box would be complete without a one? Definitely not this one.

ThenComesColor_DIY_SweetTasteTest_Poem.jpg

Now for the best part! Placing each gummy into its new home.  

ThenComesColor_DIY_SweetTasteTest_Gummies2.jpg

Assembling everything together.

ThenComesColor_DIY_SweetTasteTest_Complete1.jpg
ThenComesColor_DIY_SweetTasteTest_Complete2.jpg

The finished candy box came out better than I would have expected. It was too cute to part with but off I shipped it to the West Coast knowing how much my boyfriend would get a kick out of this surprise gift. He absolutely loved all the gummies, especially the #Social candy ones but we both agreed that nothing beats the taste of an Autodrop Cadillac.

This was a really fun and unexpected project that was not only so much fun to make but tasty as well. I think I may need to head over to Sockerbit soon to get my sweet fix!  

ThenComesColor_DIY_SweetTasteTest_Complete3.jpg

Oh so sweet! DIY gift

ThenComesColor_DIY_SweetTasteTest_Complete4.jpg
ThenComesColor_DIY_SweetTasteTest_Complete5.jpg

Money Lei with Kukui Nuts

A family friend's daughter graduated from high school last month and I was inspired to create a money lei with kukui nuts for her. I remember being so excited to wear beautiful orchid and candy leis for my high school graduation and thought that this would be the perfect gift that would paid homage to Hawaii, a state that has a special place in her heart.

ThenComesColor_DIY_Money_Lei_Nuts.jpg

THINGS YOU WILL NEED:

  • 2 60" of black ribbon

  • 20 5 dollars bills (dollar denomination and amount is up to you)

  • tape (removable tape would be best)

  • scissors

  • 28 kukui nuts

  • embroidery needle

ThenComesColor_DIY_Money_Lei_Materials.jpg

You will first need to fold all the dollar bills. This process can be a bit nerve-wrecking as the folding can really wear on the bills. So be as gentle as you can while still creating crisp folds.

To begin, fold the bill in half lengthwise with the front facing down. Open the bill up and using the newly creased center line as a guide fold the four corners inward to create two triangles on each side (below right).

ThenComesColor_DIY_Money_Lei_Folding1.jpg
ThenComesColor_DIY_Money_Lei_Folding2.jpg

Next, fold the top and bottom ends to the center line. (below left). Then fold these flaps back so they are aligned to the top and bottom ends respectively (below right). 

ThenComesColor_DIY_Money_Lei_Folding3.jpg
ThenComesColor_DIY_Money_Lei_Folding4.jpg

Flip the entire bill over so that the front is facing you. (Hi Mr. Abe Lincoln!) Fold the bottom flap to the center line (below left) and fold the top flap to the same line (below right).

ThenComesColor_DIY_Money_Lei_Folding5.jpg
ThenComesColor_DIY_Money_Lei_Folding6.jpg

Then fold the center line again so that you are left with a zig-zagged dollar bill with pointed edges.

ThenComesColor_DIY_Money_Lei_Folding7.jpg

Next, you will need to fold each bill in half to create something that almost looks like a butterfly. You will want to make sure the president's image is facing you to have the prettiest result. 

ThenComesColor_DIY_Money_Lei_Folding7.jpg
ThenComesColor_DIY_Money_Lei_Folding8.jpg

Secure the two flaps together with a piece of tape. Try to use as little tape as possible while still being secure. Removable tape works best. The last thing you want is for your graduate to rip his or her celebratory loot. 

ThenComesColor_DIY_Money_Lei_Threading.jpg

Now you are ready to string everything together. Take the two pieces of ribbon and tie a double knot about 9-11" from one end. String both ribbons through your embroidery needle, then string one kukui nut and knot. Repeat this until you have strung four nuts. You can also double knot in between each nut if you want them to look more spaced out.

ThenComesColor_DIY_Money_Lei_Knot.jpg
ThenComesColor_DIY_Money_Lei_Needle.jpg

At this point, you are ready to string the folded dollar bills. Make sure the two ribbons are separated. 

ThenComesColor_DIY_Money_Lei_Threading.jpg

Please one bill on top of the bottommost ribbon (below left) then string that ribbon through the middle of the bill (below right). Be as gentle as you can.

ThenComesColor_DIY_Money_Lei_Threading2.jpg
ThenComesColor_DIY_Money_Lei_Threading3.jpg

String the topmost ribbon through the middle of the dollar (below left) and pull both ribbons gently until the ribbons are taut but not so tight that the dollar bill is being scrunched. Tie a gentle knot. 

ThenComesColor_DIY_Money_Lei_Threading4.jpg
ThenComesColor_DIY_Money_Lei_Threading5.jpg

String another kukui nut and repeat this process until all the dollar bills have been strung. Then finish with four nuts with knots in between each to match the other end of the lei. Tie each end together and trim off any excess ribbon.

ThenComesColor_DIY_Money_Lei_Threading6.jpg

And there you have it! A simple but very beautiful lei that will make your graduate gleam with pride. You can change the amount of dollar bills you use and there are a wide variety of painted nuts available online that will add a personalized touch to your lei. 

ThenComesColor_DIY_Money_Lei_Complete.jpg

Congratulations to all this year's graduates!

ThenComesColor_DIY_Money_Lei_Complete2.jpg

DIY Macrame Bracelet

I feel the greatest joy when I make things to give to others. Seeing my friends' reaction when they receive a handmade item is priceless. Plus, my brother's tiny studio that I am staying at does not have anymore space for my random crafting supplies and DIY projects so it is best I make things to give away.

Well, my dear friend Melissa is spearheading her own yoga wear line and I wanted to make her something that would complement her vibrant graphic print yoga pants. I decided to make her a hamsa charm macrame bracelet and her Marketing & PR Manager Vivia (also a close friend) an eye evil one that will hopefully bring them good luck and ward away any bad spirits as they work together to build Rumi into a worldwide yoga brand. 

Try making these simple but super stylish bracelets and check out Rumi Yoga Wear to find a pair of yoga pants that you can wear your bracelet with. Because nothing is better than looking fabulous while getting fit.

ThenComesColor_DIY_Macrame_Bracelet_complete3.jpg

THINGS YOU WILL NEED:

  • 4 yards of 0.5mm Chinese knotting cord

  • charm with holes on both sides

  • tape

  • scissors

  • multi-use glue

  • an embroidery needle (optional)

  • 2 or 4 beads for the ends (optional)

ThenComesColor_DIY_Macrame_Bracelet_items.jpg
ThenComesColor_DIY_Macrame_Bracelet_items_closeup1.jpg

Cut the Chinese knotting cord so that you have one 10" piece, two 20" pieces, and two 30" pieces. These lengths are for an average-sized wrist. As I have a super tiny wrist, I actually needed less.

ThenComesColor_DIY_Macrame_Bracelet_items_lengths.jpg

Take one of the 20" pieces and fold it in half to make a cow hitch knot. Thread the cord's looped end into the hole of the charm, then thread the opposite ends into its loop. Pull the cord tightly so that your knot is as close to the charm's hole as possible. Make the same knot with your second 20" cord on the charm's other hole. 

ThenComesColor_DIY_Macrame_Bracelet_loop.jpg

Tape down the two pieces of cord onto your working surface. 

ThenComesColor_DIY_Macrame_Bracelet_tape.jpg

Next, measure how long your bracelet should be. As you can see below, I have marked on my wrist about where the knotting should end. Mark on your working surface that length (as seen in the above photo).

ThenComesColor_DIY_Macrame_Bracelet_marking

Now for the knotting. Tie a regular knot with one of the 30" cords, making sure it is centered and as close to the charm as possible.

ThenComesColor_DIY_Macrame_Bracelet_knot.jpg

1. Make a "D" shape with the right-side cord.
2. Bring the left-side cord towards the intersection point of the taped-down cords and the right-side cord.

ThenComesColor_DIY_Macrame_Bracelet_knottingR1.jpg

3. Loop the left-side cord under the taped-down cords and right-side cord.
4. Pull the left-side cord upwards and over the right-side cord. Tighten the newly created knot.

ThenComesColor_DIY_Macrame_Bracelet_knottingR2.jpg

Do the same from the opposite side.

1. Make a reversed "D" shape with the left-side cord.
2. Bring the right-side cord towards the intersection point of the taped-down cords and the left-side cord.

ThenComesColor_DIY_Macrame_Bracelet_knottingL1.jpg

3. Loop the right-side cord under the taped-down cords and left-side cord.
4. Pull the right-side cord upwards and over the left-side cord. Tighten the newly created knot. 

Repeat this with the right-side cord then left-side cord until you reach your marking. 

ThenComesColor_DIY_Macrame_Bracelet_knottingL2.jpg

To secure the ends, make a regular knot. Before it is completely tightened, place a tiny amount of glue with a toothpick or pencil where the knot will rest, then tighten. Trim the excess cord and carefully add a bit more glue around the knot to make sure everything is secured. Do the same steps with your other 30" cord.

ThenComesColor_DIY_Macrame_Bracelet_Gluing.jpg

To connect the bracelet, fold the ends together. Make sure the cords are as evenly aligned as possible. 

ThenComesColor_DIY_Macrame_Bracelet_foldover.jpg

Tie a regular knot around the folded over cords with the last 10" cord, making sure it is centered. 

ThenComesColor_DIY_Macrame_Bracelet_foldoverknot.jpg

Use the same square knotting technique until you reach about an inch in length. Again, finish off by tying a knot, adding a bit of glue to secure everything then trimming the excess. Be extra careful that the glue is placed only around the knot. Getting glue on the other cords will prevent it from loosing and tightening. 

ThenComesColor_DIY_Macrame_Bracelet_foldoverknot2.jpg

Optional: Add beads to the loose cord ends. You can forego the beads and just knot the ends but I think the beads give a more polished and expensive look to the bracelet.

ThenComesColor_DIY_Macrame_Bracelet_endbeads.jpg

Trim the excess cord and add a bit of glue around the knots to secure them. And there you have it!

ThenComesColor_DIY_Macrame_Bracelet_endbeads3.jpg
ThenComesColor_DIY_Macrame_Bracelet_complete1.jpg
ThenComesColor_DIY_Macrame_Bracelet_complete2.jpg
ThenComesColor_DIY_Macrame_Bracelet_complete4.jpg
ThenComesColor_DIY_Macrame_Bracelet_complete3.jpg