
DIY Macrame Bracelet
I feel the greatest joy when I make things to give to others. Seeing my friends' reaction when they receive a handmade item is priceless. Plus, my brother's tiny studio that I am staying at does not have anymore space for my random crafting supplies and DIY projects so it is best I make things to give away.
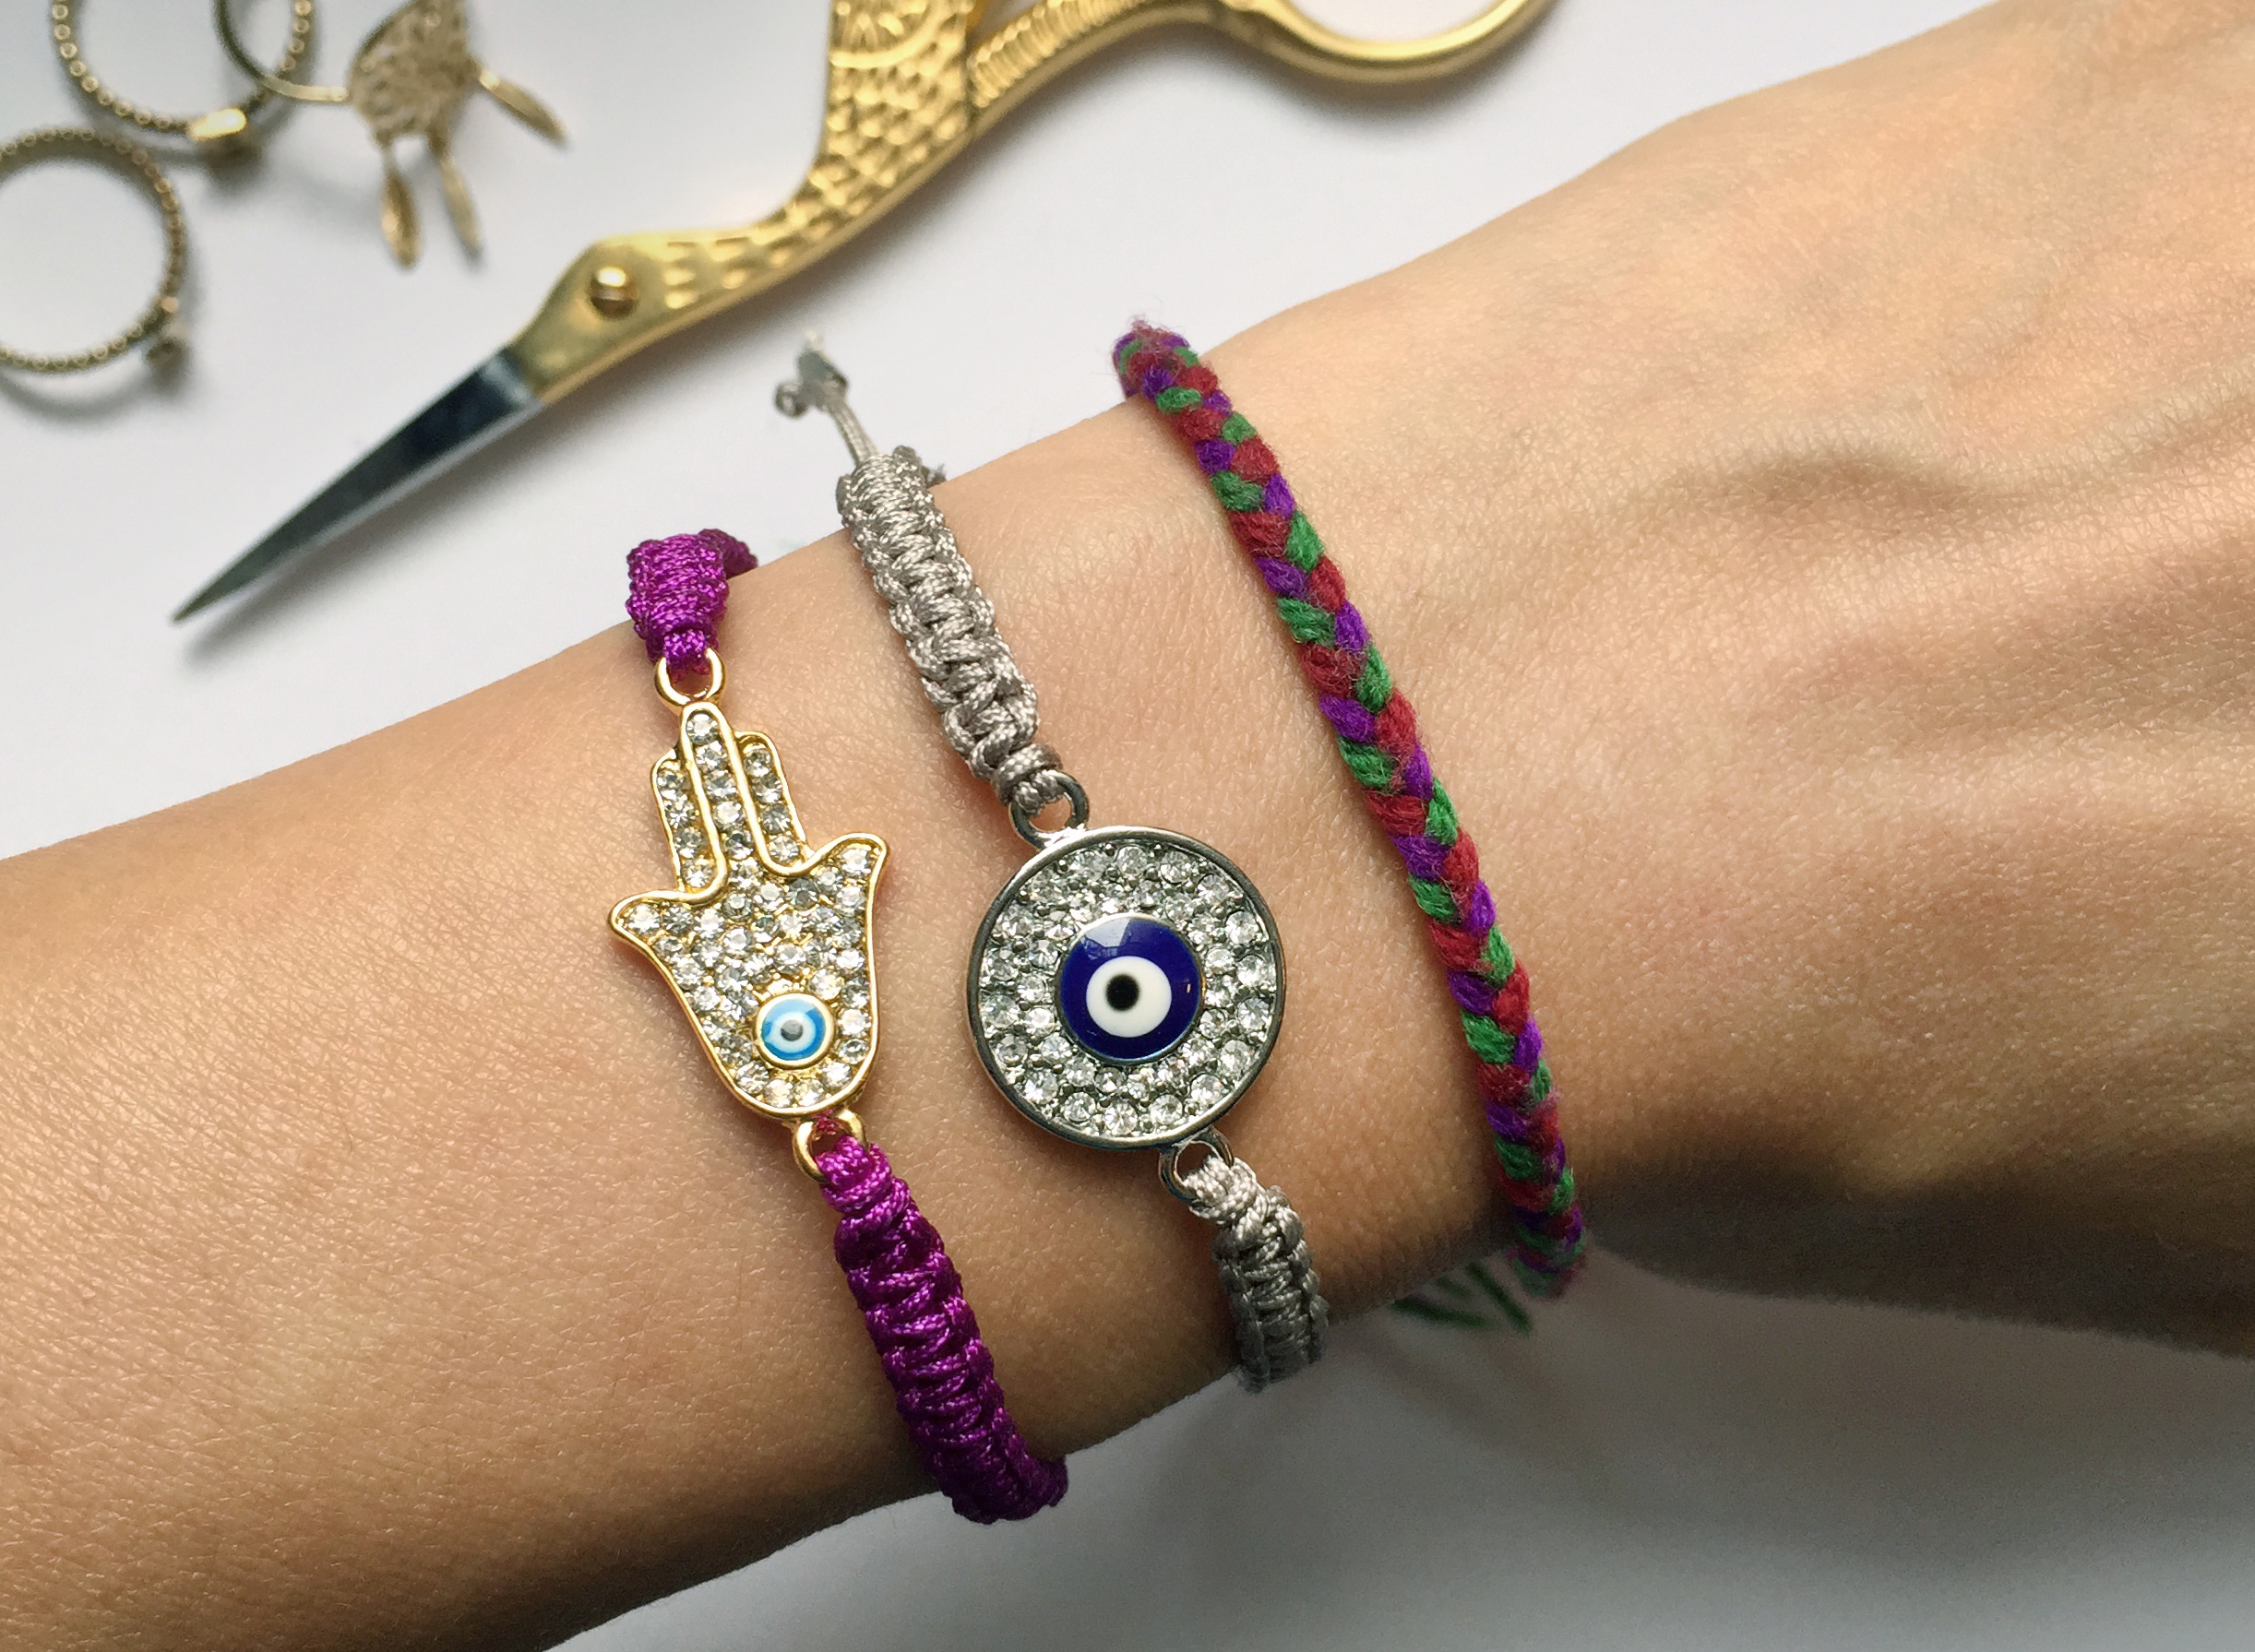
Well, my dear friend Melissa is spearheading her own yoga wear line and I wanted to make her something that would complement her vibrant graphic print yoga pants. I decided to make her a hamsa charm macrame bracelet and her Marketing & PR Manager Vivia (also a close friend) an eye evil one that will hopefully bring them good luck and ward away any bad spirits as they work together to build Rumi into a worldwide yoga brand.
Try making these simple but super stylish bracelets and check out Rumi Yoga Wear to find a pair of yoga pants that you can wear your bracelet with. Because nothing is better than looking fabulous while getting fit.
THINGS YOU WILL NEED:
4 yards of 0.5mm Chinese knotting cord
charm with holes on both sides
tape
scissors
multi-use glue
an embroidery needle (optional)
2 or 4 beads for the ends (optional)


Cut the Chinese knotting cord so that you have one 10" piece, two 20" pieces, and two 30" pieces. These lengths are for an average-sized wrist. As I have a super tiny wrist, I actually needed less.

Take one of the 20" pieces and fold it in half to make a cow hitch knot. Thread the cord's looped end into the hole of the charm, then thread the opposite ends into its loop. Pull the cord tightly so that your knot is as close to the charm's hole as possible. Make the same knot with your second 20" cord on the charm's other hole.

Tape down the two pieces of cord onto your working surface.

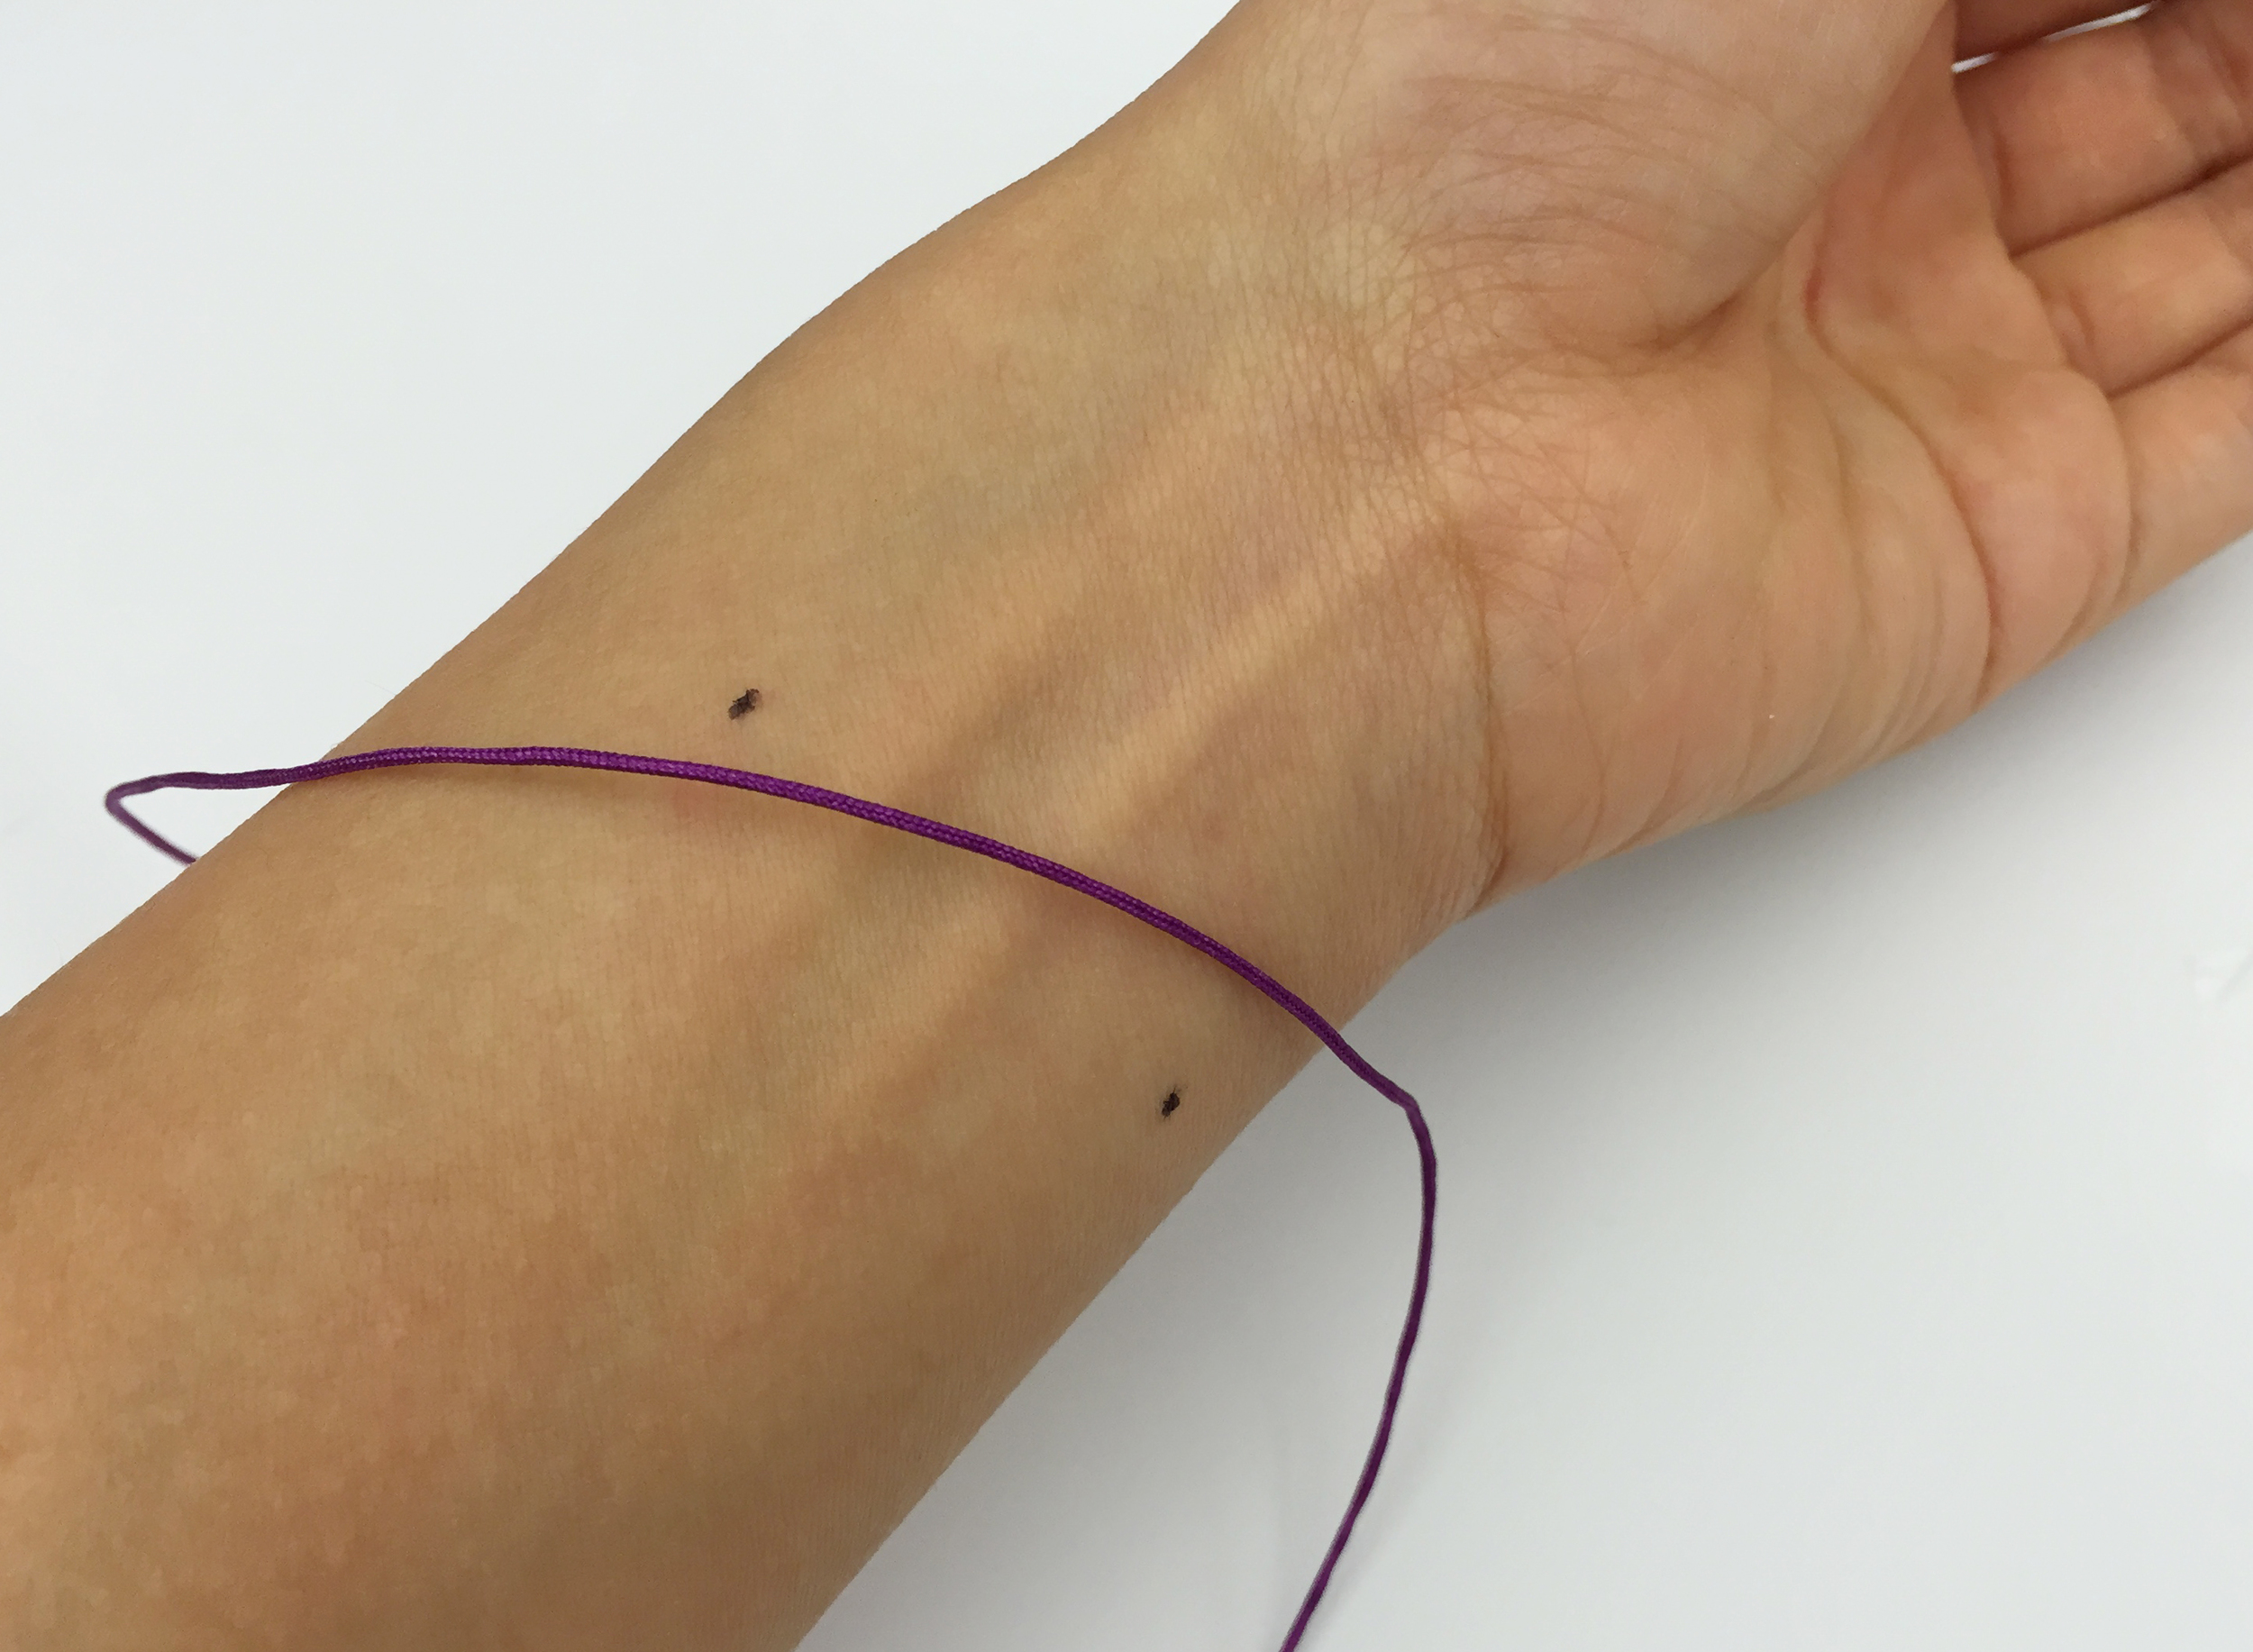
Next, measure how long your bracelet should be. As you can see below, I have marked on my wrist about where the knotting should end. Mark on your working surface that length (as seen in the above photo).
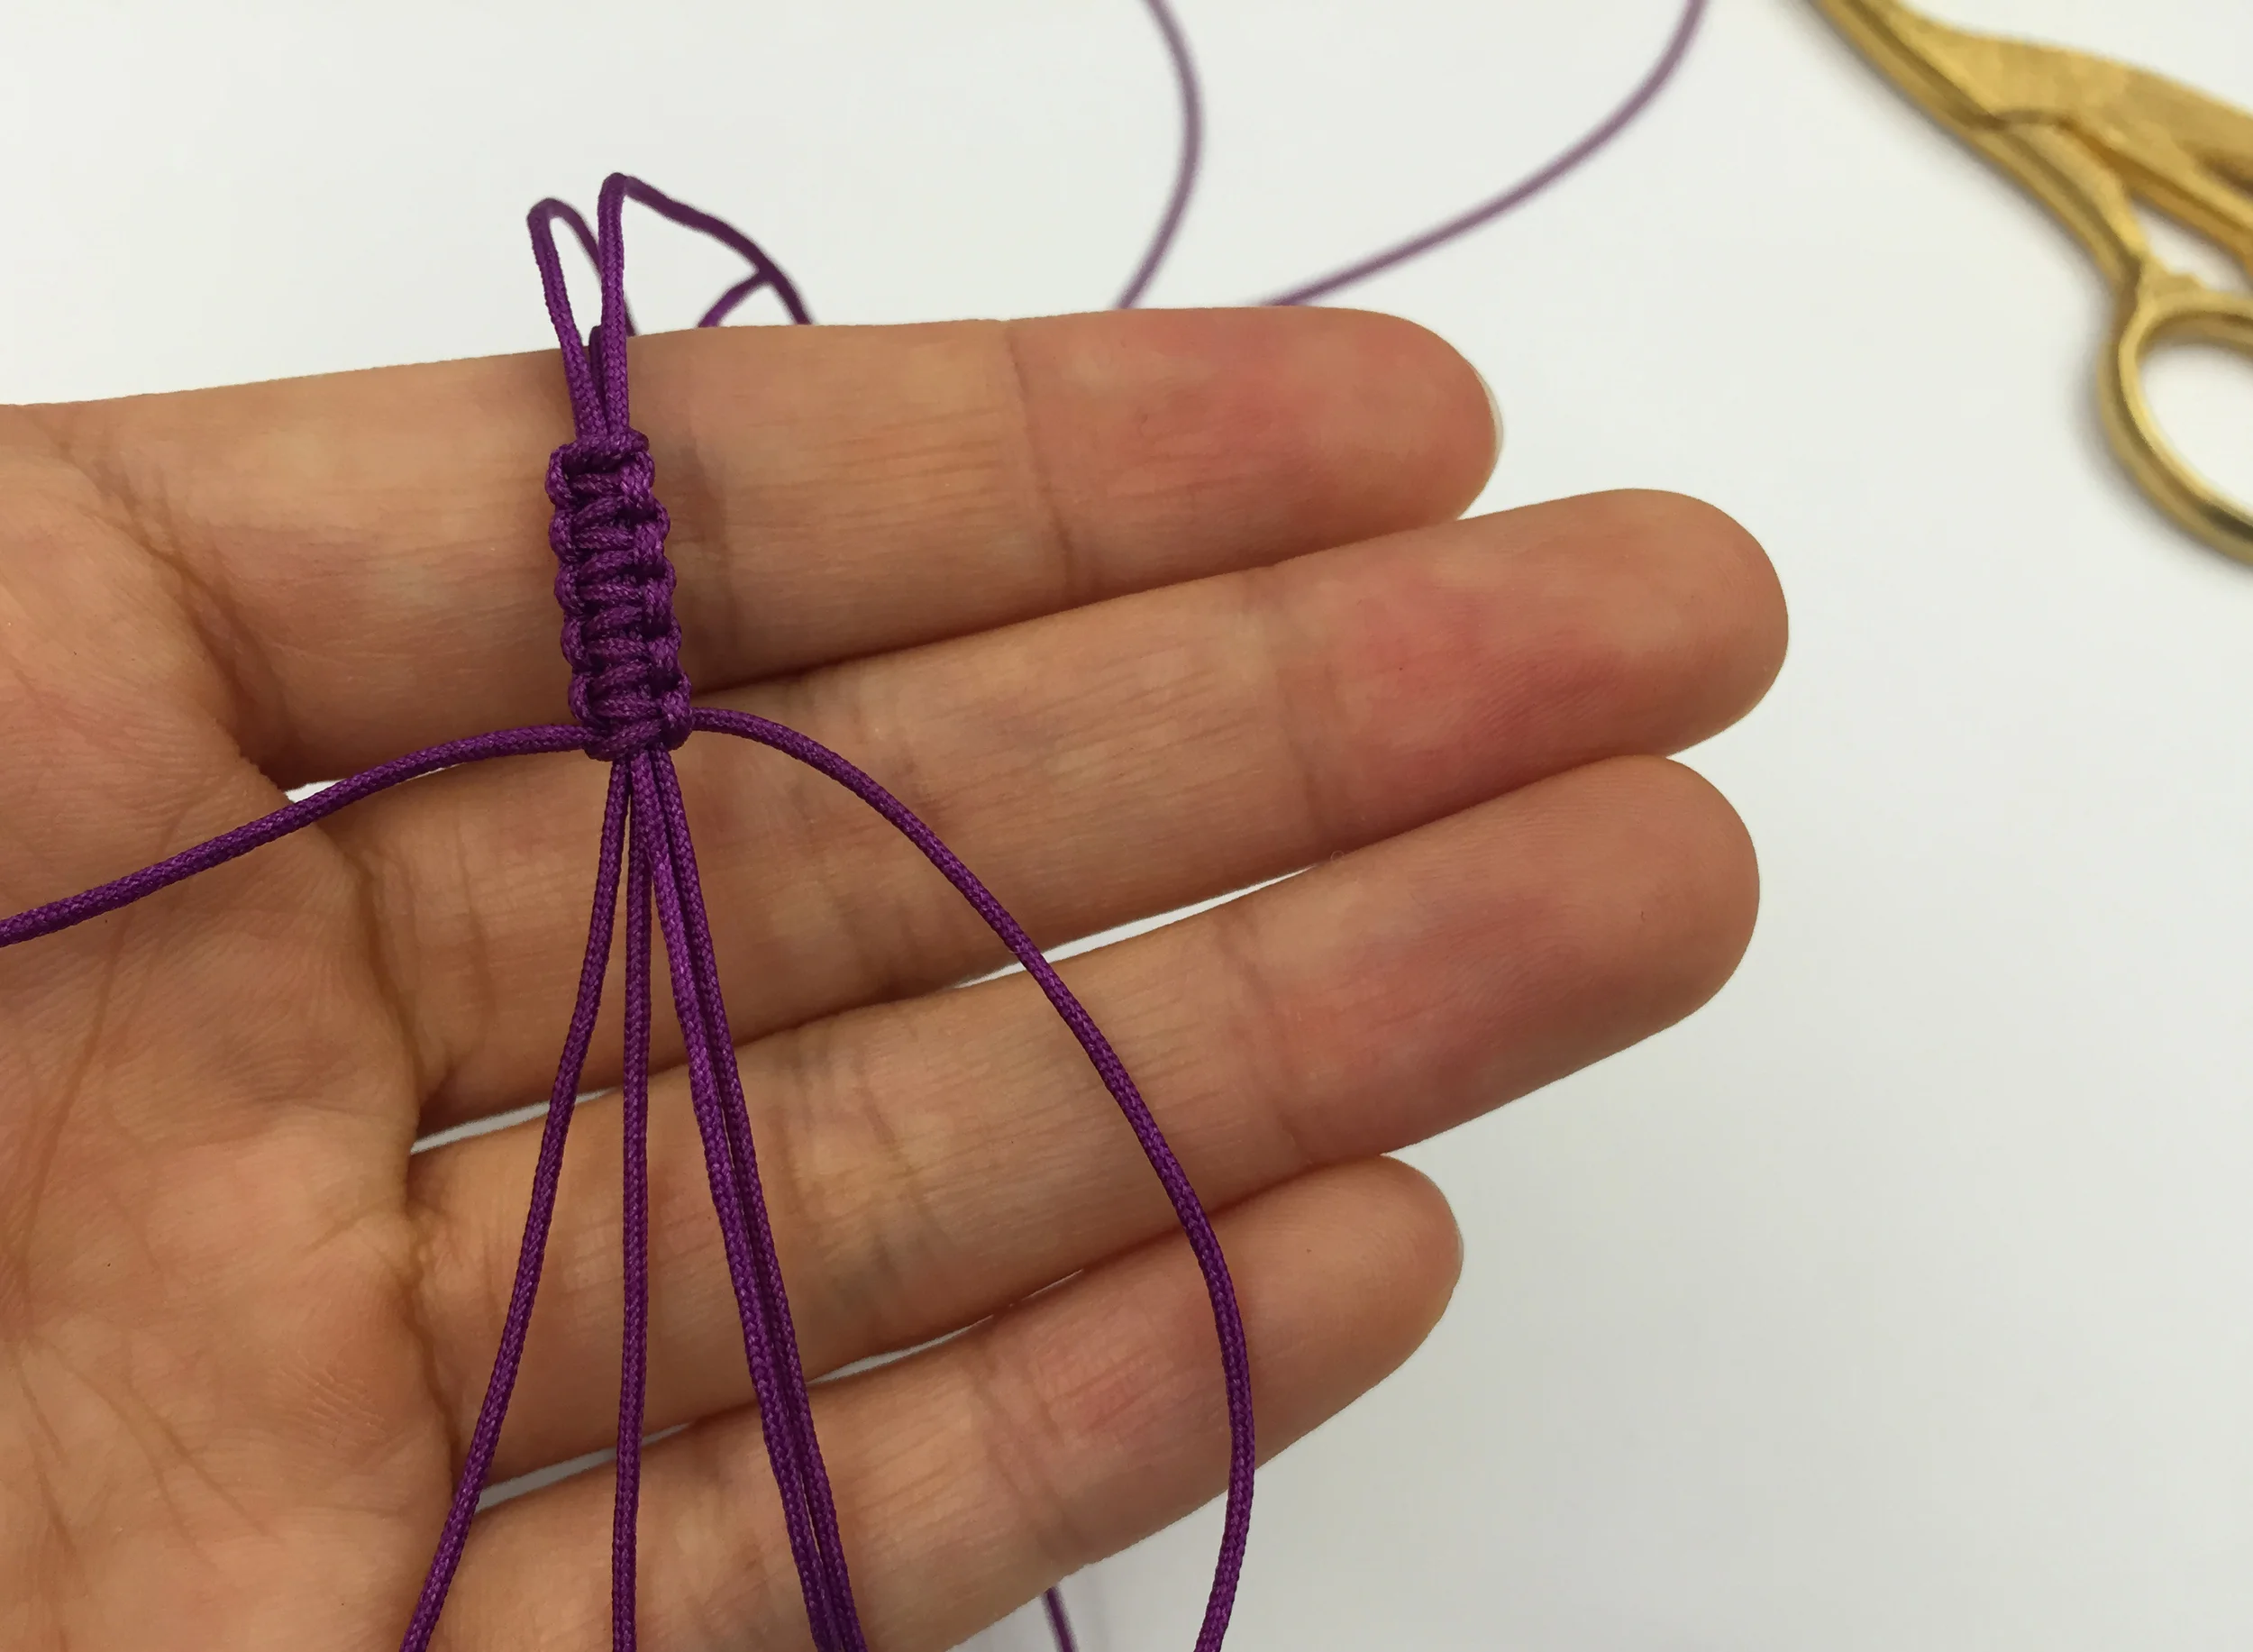
Now for the knotting. Tie a regular knot with one of the 30" cords, making sure it is centered and as close to the charm as possible.

1. Make a "D" shape with the right-side cord.
2. Bring the left-side cord towards the intersection point of the taped-down cords and the right-side cord.

3. Loop the left-side cord under the taped-down cords and right-side cord.
4. Pull the left-side cord upwards and over the right-side cord. Tighten the newly created knot.

Do the same from the opposite side.
1. Make a reversed "D" shape with the left-side cord.
2. Bring the right-side cord towards the intersection point of the taped-down cords and the left-side cord.

3. Loop the right-side cord under the taped-down cords and left-side cord.
4. Pull the right-side cord upwards and over the left-side cord. Tighten the newly created knot.
Repeat this with the right-side cord then left-side cord until you reach your marking.

To secure the ends, make a regular knot. Before it is completely tightened, place a tiny amount of glue with a toothpick or pencil where the knot will rest, then tighten. Trim the excess cord and carefully add a bit more glue around the knot to make sure everything is secured. Do the same steps with your other 30" cord.

To connect the bracelet, fold the ends together. Make sure the cords are as evenly aligned as possible.

Tie a regular knot around the folded over cords with the last 10" cord, making sure it is centered.

Use the same square knotting technique until you reach about an inch in length. Again, finish off by tying a knot, adding a bit of glue to secure everything then trimming the excess. Be extra careful that the glue is placed only around the knot. Getting glue on the other cords will prevent it from loosing and tightening.
Optional: Add beads to the loose cord ends. You can forego the beads and just knot the ends but I think the beads give a more polished and expensive look to the bracelet.

Trim the excess cord and add a bit of glue around the knots to secure them. And there you have it!


