Pac-Man Inspired Baby Mobile

When I found out that my friends Nicole and Loki were expecting their first bundle of joy, I decided to get my DIY on and craft a baby mobile for them. I purposefully decided to forgo the cute baby animals route and wanted to do something a little different and dare I say cool? I thought that a Pac-Man inspired baby mobile would be perfect. Who does not love the iconic 1980 Japanese arcade game? And I am sure it is a game that today's babies will still be playing in the future. So to begin I hit up my local Michael's and bought all the different colored felt I would need.

ThenComesColor_Pacman_Baby_Mobile_Felt2.jpg

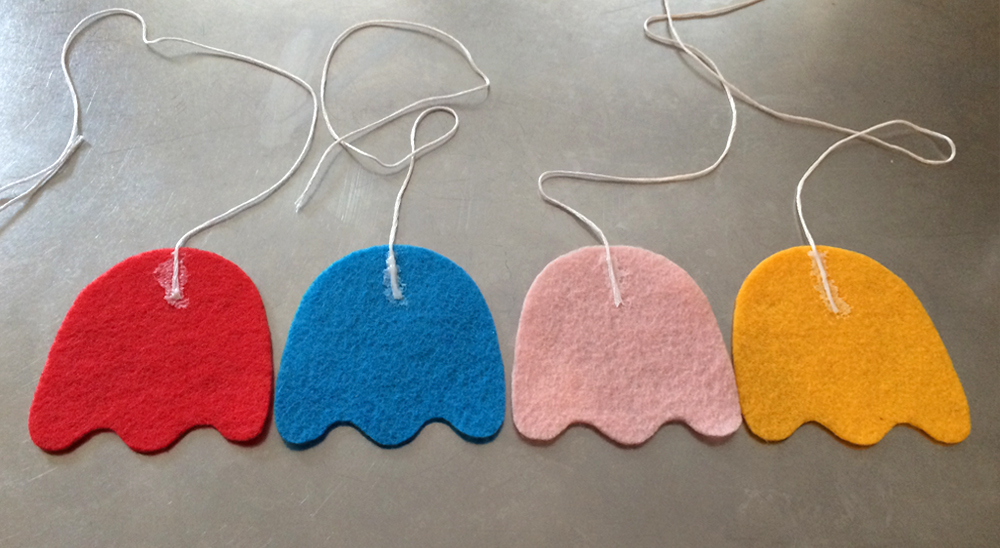
I cut out paper templates for Pac-Man and his ghost enemies and lightly traced them on the appropriately colored felts. You will need to cut two pieces for each character, one for the front, another for the back.

ThenComesColor_Pacman_Baby_Mobile_Template2.jpg
ThenComesColor_Pacman_Baby_Mobile_Template1.jpg
ThenComesColor_Pacman_Baby_Mobile_Eyes.jpg
ThenComesColor_Pacman_Baby_Mobile_Cut2.jpg

Once all the pieces were cut out, I glued white string to the tops of each. I used embroidery string I had left over from a previous project. Just to be safe, measure out a few extra inches of string so you have the flexibility on how low each hangs.

ThenComesColor_Pacman_Baby_Mobile_String.jpg
ThenComesColor_Pacman_Baby_Mobile_Cut3.jpg

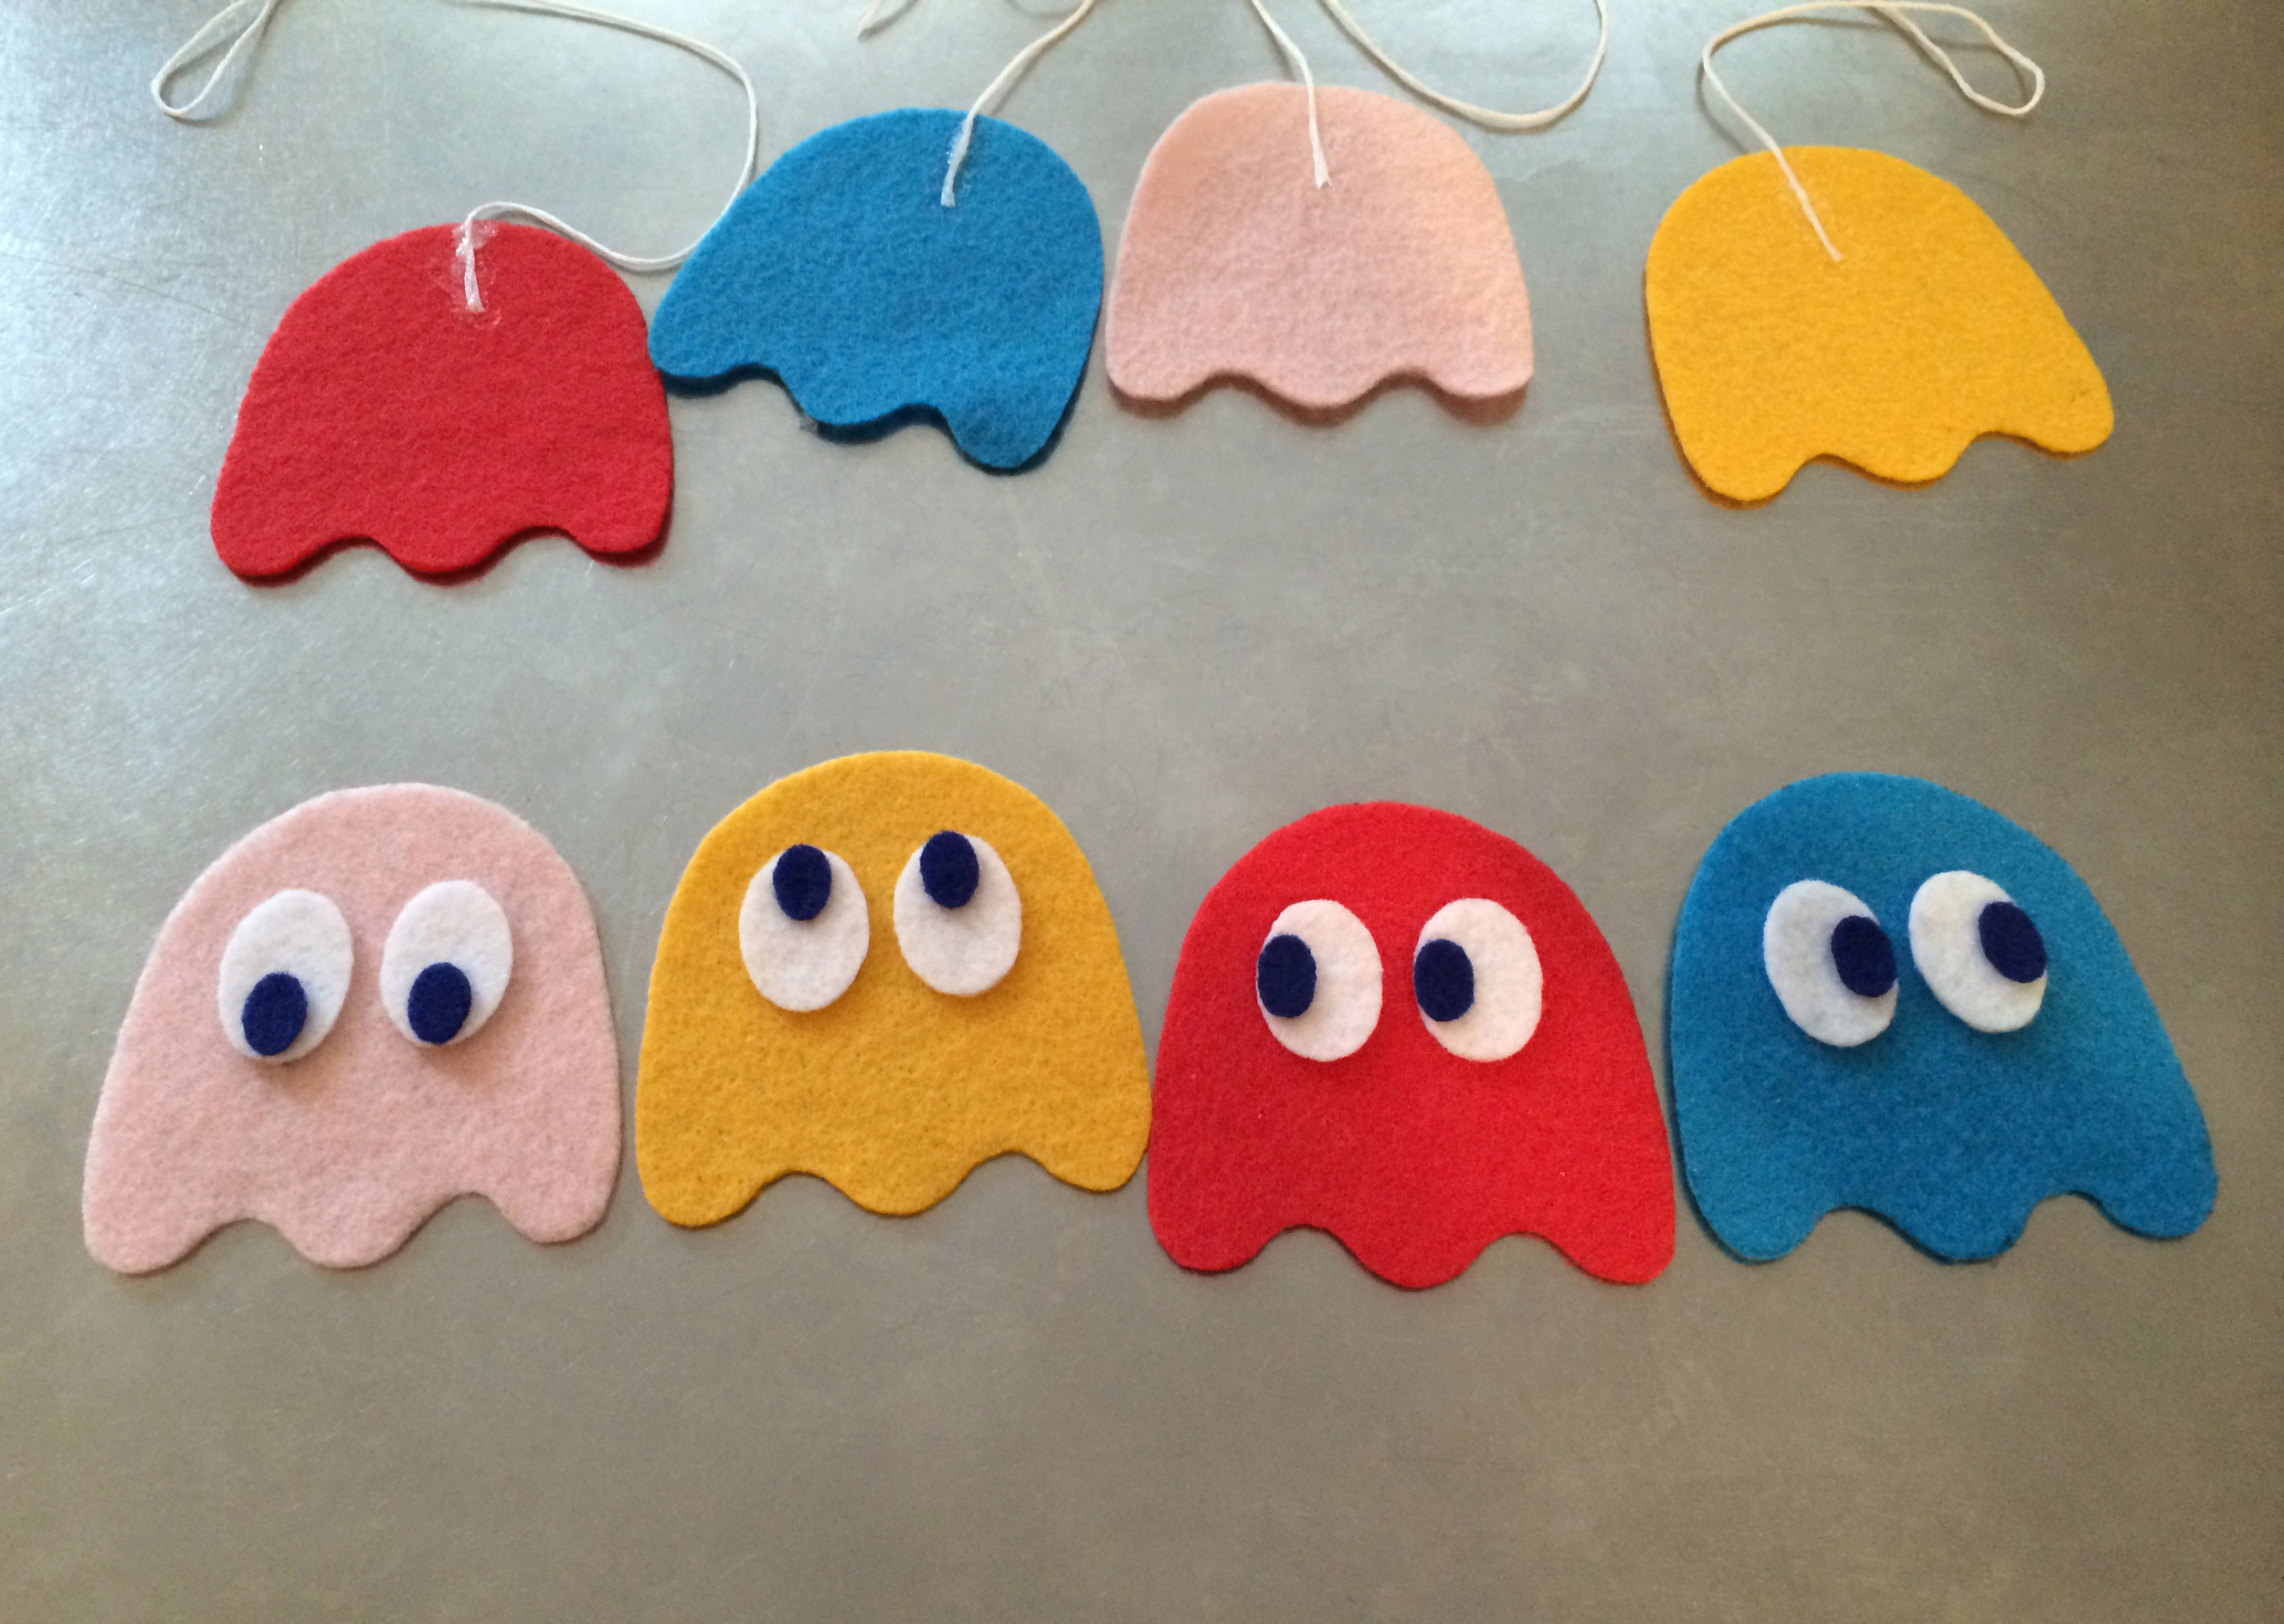
Did you know that each ghost has a name and distinct behavior in the game? Pac-Man's inventor Toru Iwatani stated in the 2011 Game Developers Conference that the red ghost (Blinky) chases Pac-Man, the pink (Pinky) and blue (Inky) ghosts position themselves in front of Pac-Man and orange ghost (Clyde) is random in its movements. I will be sure to be more observant the next time I play.

ThenComesColor_Pacman_Baby_Mobile_Cut4.jpg

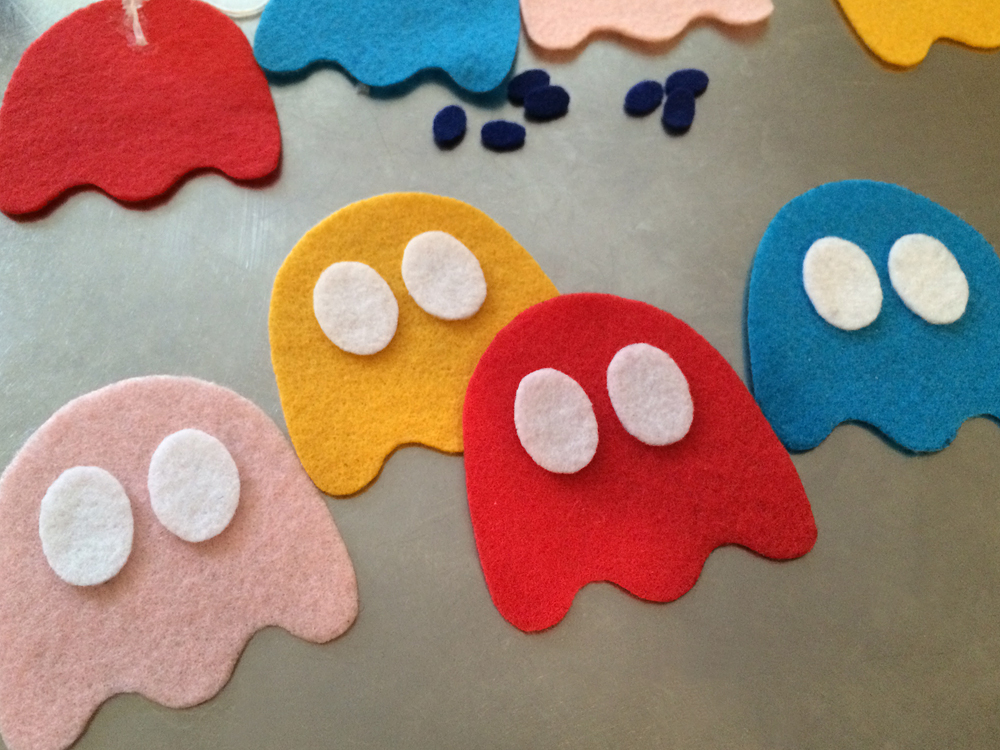
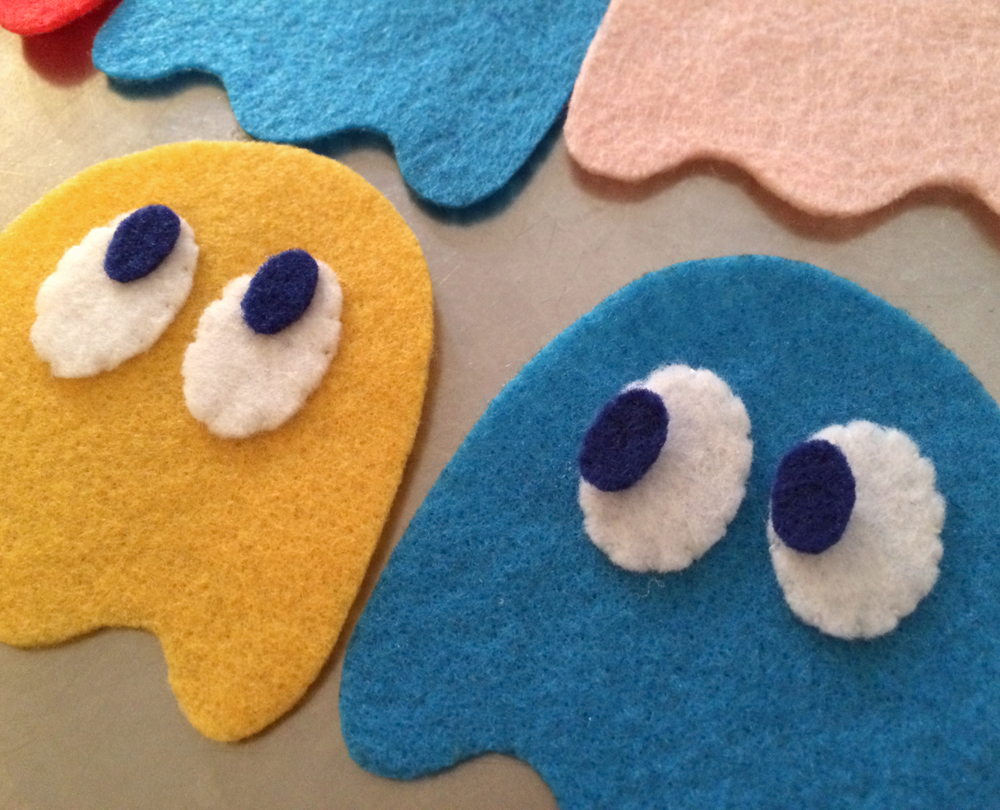
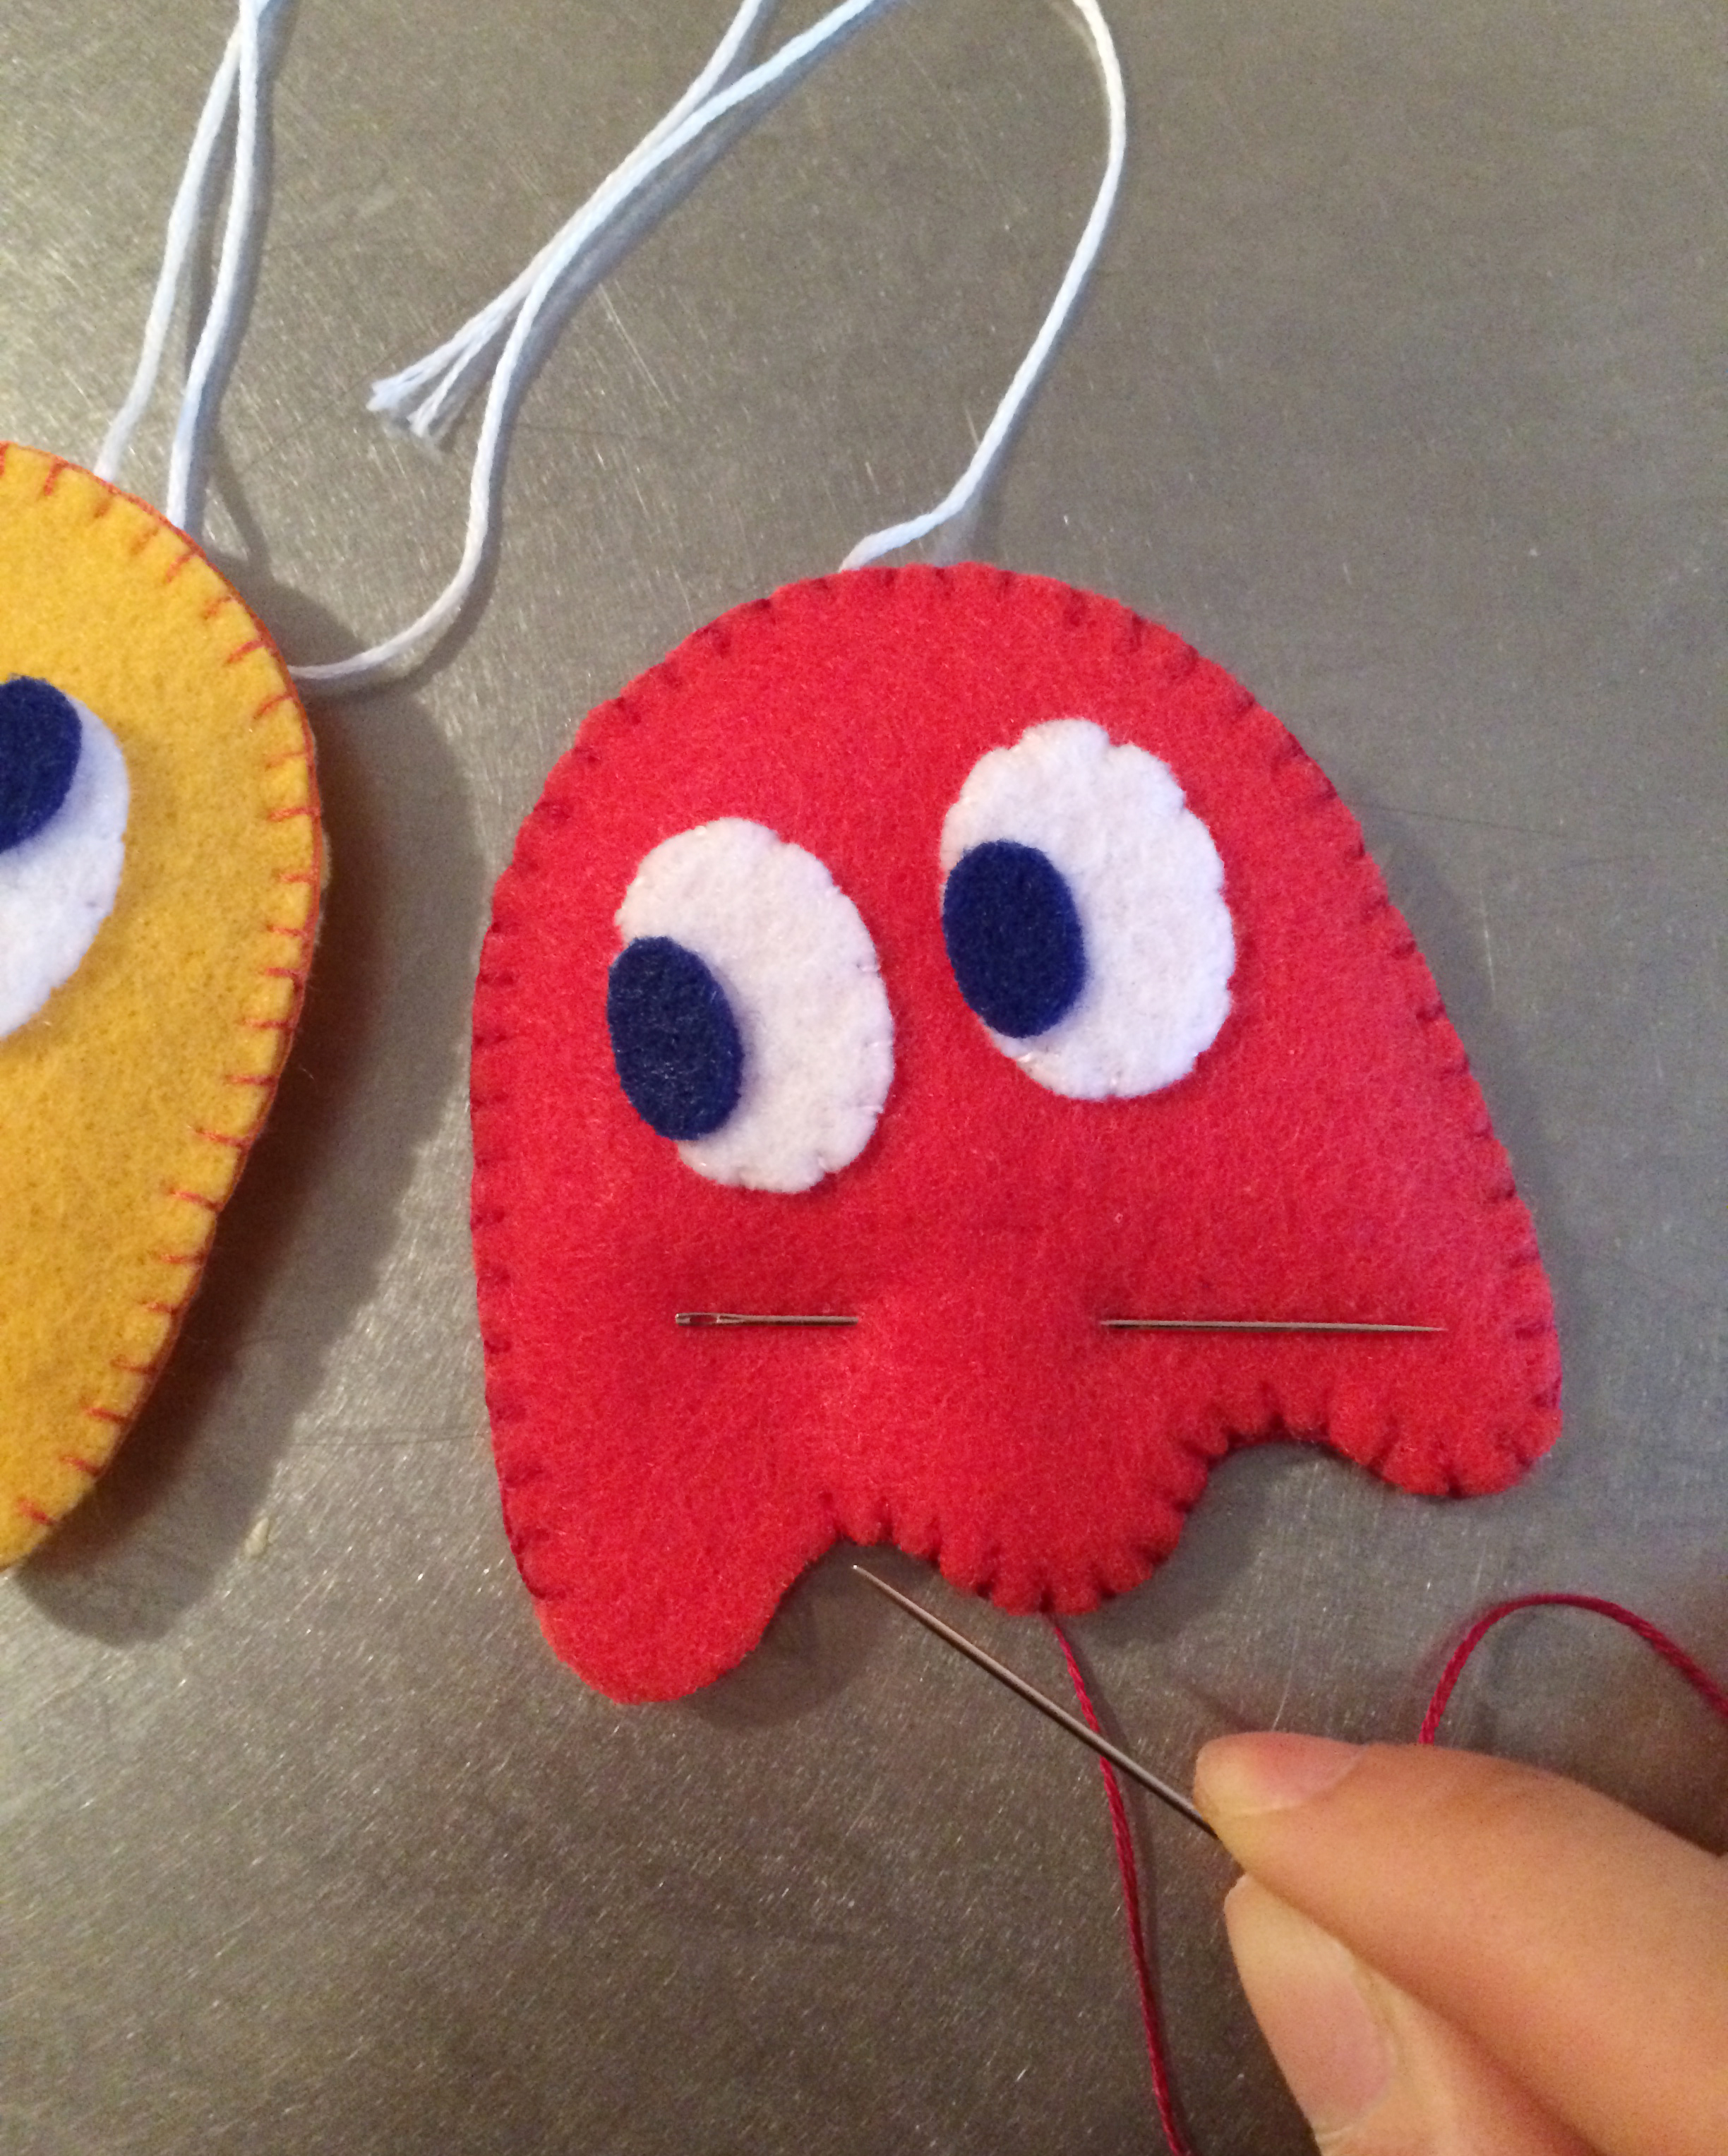
I carefully stitched the whites of the eyes to the ghosts' bodies, while gluing down the blue irises. Hope you noticed that each ghost's eyes point in different directions. It is all in the details!

ThenComesColor_Pacman_Baby_Mobile_Stitch.jpg
 
β€œI’m watching you.”
ThenComesColor_Pacman_Baby_Mobile_Stitch2.jpg

I secured the front and back for Pac-Man and each of his ghosts using a blanket stitch. Try using an embroidery thread that is a few shades darker than the felts so that there is some nice contrast and dimensionality to their overall look. Next, each got a good serving of stuffing.

ThenComesColor_Pacman_Baby_Mobile_Stuffing.jpg
 
β€œStitching everyone closed.”
ThenComesColor_Pacman_Baby_Mobile_Stitch3.jpg

For the mobile hanger, I wanted something that was simplistic and modern. I found exactly that from DIY With Wool Felt, an Etsy seller from the Netherlands. It is something you can definitely try making on your own but I cheated a little. *smiles*

ThenComesColor_Pacman_Baby_Mobile_1.jpg

Painting the ball ends of the mobile hanger to match the ivory wool felt balls that I planned to add to each string.

ThenComesColor_Pacman_Baby_Mobile_Balls2.jpg

In addition to the felt balls I wanted to incorporate some hanging fruits. After all, how can a Pac-Man game be complete without some fruit that can be munch on?

ThenComesColor_Pacman_Baby_Mobile_FruitsSketch.jpg
MakingLovely_Pacman_Baby_Mobile_Fruits.jpg
ThenComesColor_Pacman_Baby_Mobile_Stringing.jpg

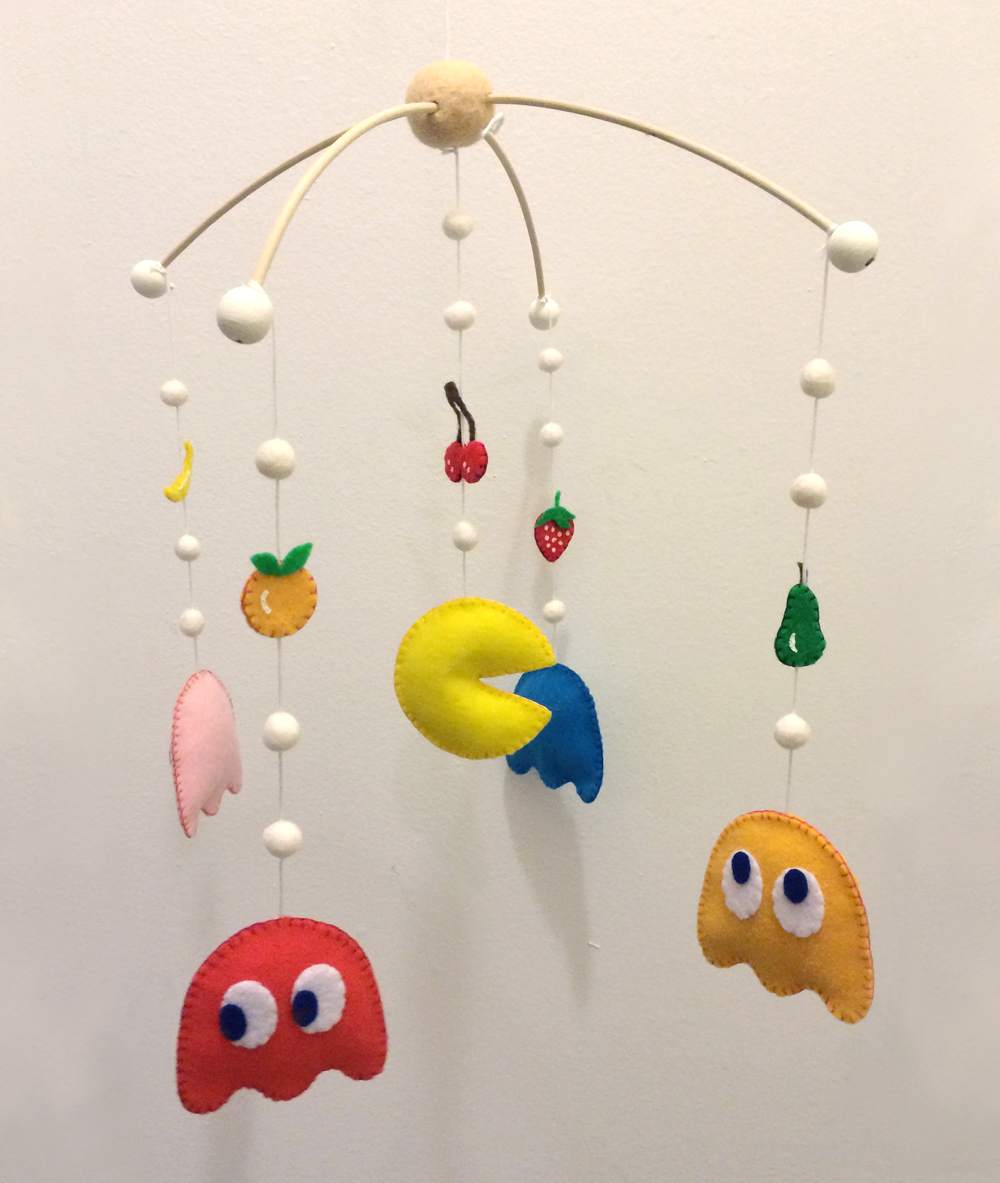
Yatta! (All Done!)

I really hope Nicole and Loki like this baby mobile as much as I had fun making it. Does it make me a baby that I catch myself mindlessly staring at Pac-Man and his ghosts as they gently turn with the tiniest movements of the room? And so what if it does?! Anyways, I hope Baby Ivy, as our friends dubbed her or Baby Ivan if it is a boy will enjoying looking up at it as s/he falls asleep. Can't wait to meet you lil' one!  β™₯

ThenComesColor_Pacman_Baby_Mobile_Complete.jpg
ThenComesColor_Pacman_Baby_Mobile_Complete2.jpg
ThenComesColor_Pacman_Baby_Mobile_Complete4.jpg
ThenComesColor_Pacman_Baby_Mobile_Complete3.jpg

Hexidecimal Code Countdown

My boyfriend and I are currently in a long-distance relationship, I being in New York and he in the Bay Area. This is not our first time at love miles away, for two years I was working in Hong Kong while he was in San Francisco. Of course being apart is never easy, but from that distance "The Countdown," was born, a roughly week long themed-email exchange to "countdown" the days until we would see each other again.

I have been in The Big Apple since the end of August and flew back to San Francisco to see JB (and family of course) for the Thanksgiving holiday. During this roughly three-month time period each of us selected a hexidemical code to represent each day. This code is a six-digital number primarily used in the digital world to indicate a specific color. The first two digits represent red, the middle two green, and the last two blue. For example, #CC66FF is a bright purple and #FFFFFF is white. Yes, I know this is super nerdy, but I am not ashamed of it!

So let the color picking begin! Sigh, SOOOOOO many days to color in.

ThenComesColor_HexadecimalColor_Start.png

August 2014

ThenComesColor_HexadecimalColor_August.png

September 2014
As you can see I gravitated towards the pinks and fuschias while JB prefered the blues and greens.

ThenComesColor_HexadecimalColor_September.png

October 2014
I went the rainbow route for this month.

ThenComesColor_HexadecimalColor_October.png

November 2014
The rainbow continued, while JB stuck with the blues and greens for the final month. Sometimes habits die hard.

ThenComesColor_HexadecimalColor_November2.png

Text Message Wedding Congratulatory Video

My dearest friends Ivy and Jeff tied the knot this past weekend and I must say their wedding was by far one of my favorites for so many reasons. I was amongst my closest friends and the entire wedding was sprinkled with magical moments, from the incredibly heart-felt vows, to the touching speeches that made me cry (I FINALLY cried at a wedding!) and all the comedic moments in between that really showcased the couple's personalities and love for each other.

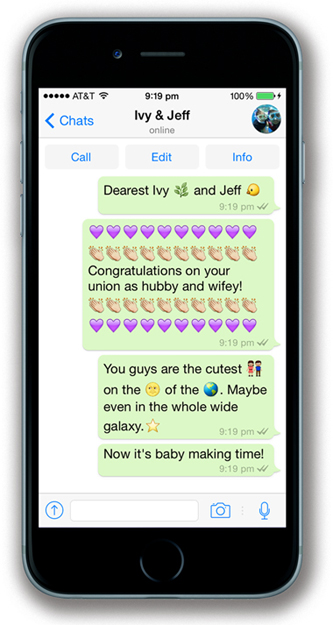
Well, one of Jeff's groomsmen asked that each of the couple's friends submit a 2-3 minute congratulatory video that would be played during the reception. Of course, I excitedly put on my creative thinking cap and let the creative juices start flowing. I was quickly inspired by something that I personally think we do a little too much of these days - texting. I decided I would text Ivy and Jeff their wedding message, making sure to add as many emojicons as possible.

ThenComesColor_Emoji_Inspired_Wedding_Message1.jpg
ThenComesColor_Emoji_Inspired_Wedding_Message2.jpg
ThenComesColor_Emoji_Inspired_Wedding_Message3.jpg
ThenComesColor_Emoji_Inspired_Wedding_Message4.jpg

I had such a fun time making this video, changing several times until I felt I was wearing the perfect top, making sure to record myself talking only after a train passed by so that the noise would not ruin the audio and of course driving my boyfriend nuts by texting all of these messages to him so I could grab the screenshots. But all is good in the hood as I am happy to report that Ivy and Jeff loved the video. Cheers to the happy couple! β™₯

Customized Get Uncommon iPhone Case

For some reason I had the itch to get a new iPhone case. Do not get me wrong, I absolutely love my Yellena James case that I found a few years ago after combing through literally thousands of cases on Etsy. What I love about Yellena's work is her brilliant use of vibrant colors and undulating lines that make me feel like I am in a coral-reef-filled scene from Finding Nemo. Plus, her work can be spotted on Modern Family - now THAT is cool.

ThenComesColor_Customized_Uncommon_iPhoneCase_YellenaJames.jpg

This time around I decided to semi-design my own iPhone case. Why do I say semi-designed, you ask? Well, if you google "line icons" you will see a plethora of beautifully-designed minimalist icons for everything from kitchen tools to travel gear. Many are free to download and use so rather than reinventing the wheel, I decided to use them as a starting point for my design. I will have links to all the sites I grabbed them from at the end of this post.

Well, your phone is probably the single most important object you use on a daily basis (whether we like it or not). As such, I wanted my new case to be my daily reminder to strive to do the things that bring joy to my life. I gathered all the icons (and drew out a few) that make me happy and surrounded them around the tagline "Do What You Love." It is such a simple motto to say but not always easy to live by. It is always easier to complain than to change, easier to conform and be complacent than to demand something better. But life is too short to be unhappy.

ThenComesColor_Customized_Uncommon_iPhoneCase_artwork.jpg

So whether it is traveling or painting, trying your hand at a new skill or reading a fabulous book (I highly recommend Tina Fey's Bossypants), DO WHAT YOU LOVE.

I used Get Uncommon to print my iPhone case design. The process is super easy and the printing quality is really great. And I have to say a big THANK YOU to them. Why you ask? Well, I was so disappointed when I received my case because the artwork was not centered. I asked if they would be so kind to reprint the case, fully expecting they would say no. Luck for me, they did and even sent me a screen cleaning cloth. An example of great customer service, if I say so myself. I will definitely order my next case from them.

ThenComesColor_Customized_Uncommon_iPhoneCase_complete1.jpg
ThenComesColor_Customized_Uncommon_iPhoneCase_complete2.jpg
ThenComesColor_Customized_Uncommon_iPhoneCase_complete3.jpg

Leather Tote Making at Brooklyn Craft Company

Last month, I attended a leather tote making workshop at Brooklyn Craft Company, an adorable studio offering a variety of modern craft + DIY classes including skirt making and glass etching. When I discovered that they were offering a leather tote making class I, of course, had to sign up. I am not the best sewer and never tried sewing leather before so thought that this would be the perfect opportunity to.

MakingLovely_BrooklynCraftCompany.jpg
MakingLovely_BrooklynCraftCompany2.jpg
MakingLovely_BrooklynCraftCompany3.jpg

Joey Casey, our super fun and talented teacher, began by going over what to expect from the workshop, running through sewing machine basics and the different materials we would be working with.

MakingLovely_BrooklynCraftCompany_LeatherTote_demo.jpg

Our cow leather pieces nicely pre-cut for us. I am obsessed with this warm nude color!

MakingLovely_BrooklynCraftCompany_LeatherTote_materials.jpg

I would have to admit that sewing leather for the first time was quite nerve-wrecking. Unlike sewing fabric, which is very forgiving, if you decide to remove the stitches on leather, you would be left with very ugly needle-punctured marks. In other words, you only have one chance to get it right.

We practiced sewing on leather scrapes to make sure we got a good feel for our sewing machines. Joey continuously reminded us that our stitches don't and will not be perfect and that is perfectly alright. "People will come up to you and compliment how cute your bag looks, NOT how uneven your stitches are."

MakingLovely_BrooklynCraftCompany_LeatherTote_sewing.jpg

We had the option of sewing a pocket on the inside or outside of the tote. I decided that my pocket would live inside where it would hold my phone and keys safely away from potential pickpocketers.

MakingLovely_BrooklynCraftCompany_LeatherTote_pocket1.jpg
 
 
MakingLovely_BrooklynCraftCompany_LeatherTote_pocket2.jpg

After sewing the sides of the tote came the tricky part of closely the bottom two corners. We had to massage the leather to lie flat then sewed the corners securely closed.

MakingLovely_BrooklynCraftCompany_LeatherTote_corners.jpg

Next, adding the hardware. I am a lover of gold (sorry silver), so was really thrilled to add these sweet gold d-rings and swivel clips to the bag for the straps.


MakingLovely_BrooklynCraftCompany_LeatherTote_drings_straps3.jpg

Joey showing us how to add rivets using a rivet clamping plier to puncture holes in the leather and using a mallet to secure the rivets in place. I need to get both of these nifty tools!

The completed tote! I love everything about it - the color, the perfect size to hold everything without being too big, the messenger bag style straps and the simple fact that I made. Success! Though I will say do not use on a rainy day. I guess because the leather is not treated, it will discolor when wet. I learned the hard way. But I will DEFINITELY come back to the Brooklyn Craft Company for another one of their other classes in the near future.

MakingLovely_BrooklynCraftCompany_LeatherTote_complete.jpg